Jemook wrote:Bit of help from the pros please.. I'm a bit stuck on how to determine the levels would love a bit of advice here. Please see following screenshots and let me know which is correct or if all are incorrect

2013-07-30 11.08.31 pm.png
2013-07-30 11.09.04 pm.png
2013-07-30 11.09.36 pm.png
Are there any hard rules about where the 1st push should start from or how to determine levels?
Cheers
J
Hi Jem,
As usual, you've got yet another good thing going here because it affords us all another chance to clarify a few things that may still be hazy for us regarding Naked Trading (NT).
I am still wondering why I am chiming in here becos you called for the pros and I don't consider myself one yet. But I know what I know, and the bit I know is working, otherwise I would have thrown it out like I did the first time I attempted NT. Maybe this is what emboldens me to chip in here.
Before I say another word, I want to implore CJ to please vet as strictly as he can all that is said here, and to not hesitate to bring out his whip to lash into place anything that may be out of line.
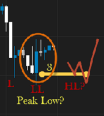
Your chart C is the correct one. A and B are wrong because they have depicted a level 1 that still lies in the M (or W as the case may be). Level 1 must lie distinct from the M or W formed in the top-most or bottom-most level. This was a hint I got from Kwanann that has proved to be so so helpful.
I also want to clarify a point here that I have wondered about for a while.
There are not 3 but 4 levels. Levels 0, 1, 2 and 3! Level 3 does not become Level1, it becomes Level 0. It cannot be otherwise if there are 3 drops (or rises) and each starts and ends in a level.
Having answered your question, I will also give you a few hints that I have found very valuable. CJ said in a post that I chose to always remember, and I quote:
"Waiting for "only" the trades after a level 3 reset is the way to put all of this together. The best "M" and "W"'s usually occur there and the moves are the longest in length. "
What I will add to this (and this is specially for you Jem

) is that you should let your bona fide level 3 be on H4, so also your Peak Highs and Lows. It is not that those on H1/M15 are not important, but I find that, subjective as level depiction is, most errors issue from the H1/M15 time frames. This is mainly because the levels on H1/M15 MUST work themselves out within the levels of H4 such that sometimes, the levels on H1/M15 do not complete before ti is time to obey the dictates of the H4 direction.
So, if for instance you are trading from an
H4 Peak High (and you know you should ALWAYS trade away from the last Peak High (or Low)), look for
Ms to trade on H1/M15 especially around the London open. Why? Because the H4 Peak High so dictates! If you see any Ws at this time, view them with suspicion and be extra careful if you choose to trade them. It is not easy, let alone advisable, to trade from one H4 Peak High to the next H4 Peak Low, and if you must trade in between the top-most levels, then it will be helpful to remember this hint.
There was one more hint I thought of at the beginning to pass on but cannot just recall anymore!!! So, maybe some other time. I hope this goes some way in helping you on.